Solar panel mounting kits are essential for getting your solar panels set up just right. They come with everything you need to secure those panels and ensure they catch maximum sunlight. Whether you’re on a roof, ground, or in an unusual space, there’s a mounting solution here for you.
Mounting Kits
Product List
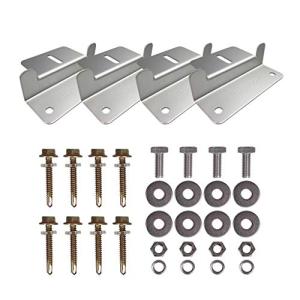
Renogy Solar Panel Mounting Z Brackets Lightw...
Product Review Score
4.98 out of 5 stars
52 reviews$10.99
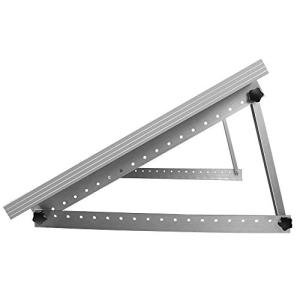
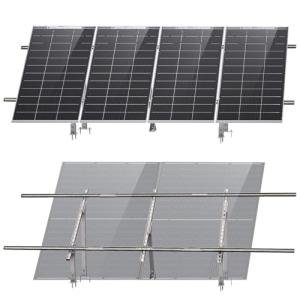
Renogy 28in Adjustable Solar Panel Mount Brac...
Product Review Score
4.72 out of 5 stars
23 reviews$39.99 $32.99
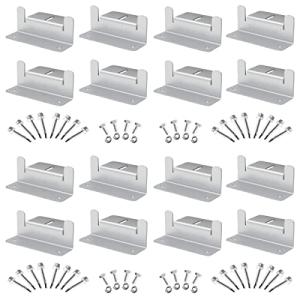
SUNMAK 16 Units per Set Solar Panel Mounting...
Product Review Score
4.85 out of 5 stars
66 reviews$17.99
Anbte Solar Panel Bracket Kit, 6 Pcs 7.87 in...
Product Review Score
4.86 out of 5 stars
47 reviews$33.99 $31.99
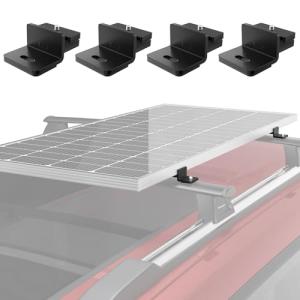
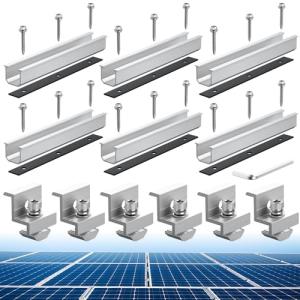
BougeRV Solar Panel T-Slot Mounting Kit Fits...
Product Review Score
4.56 out of 5 stars
107 reviews$44.99 $42.74
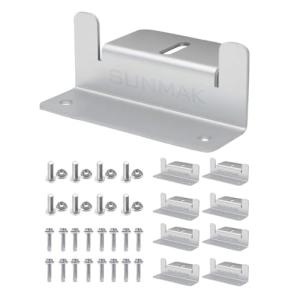
SUNMAK 8 units per set Solar Panel Mounting Z...
Product Review Score
4.97 out of 5 stars
63 reviews$7.59
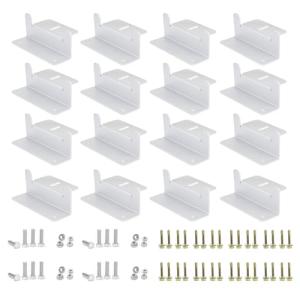
ECO-WORTHY 16 Units Solar Panel Mounting Brac...
Product Review Score
4.64 out of 5 stars
231 reviews$23.99 $18.99
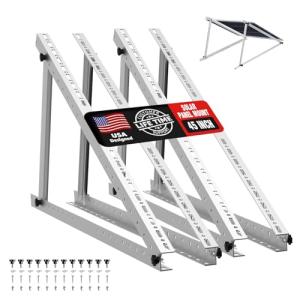
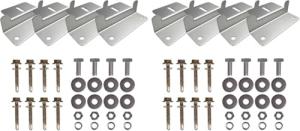
Solar Panel Mount Brackets, 2 Sets 45 inch Ad...
Product Review Score
4.43 out of 5 stars
231 reviews$71.99 $63.99
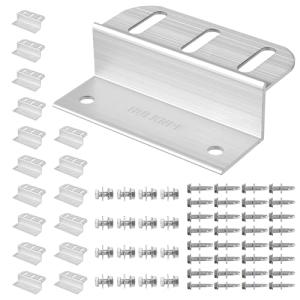
HULKNPE Z Brackets Solar Panel Mounting Kit (...
Product Review Score
4.9 out of 5 stars
102 reviews$18.29

What Is a Solar Mounting Kit?
A solar mounting kit is the complete hardware system that attaches solar panels to a surface — typically a rooftop, flat roof, ground frame, or carport structure. At its most basic, a mounting kit includes rails (the long aluminium or steel channels that panels attach to), clamps (which grip the panel frames), and the anchoring hardware that ties everything back to the structure beneath.
But a good solar mounting kit is much more than a pile of brackets. It's an engineered system designed to handle real-world loads: the dead weight of the panels themselves, live loads like a person walking across the array during maintenance, wind uplift forces, and snow accumulation in colder climates. Every component — from the racking rail profile to the lag bolt diameter — is part of a load-bearing chain that needs to work together.
When you buy a complete mounting kit, you're getting hardware that has been tested and certified as a system. That matters enormously when it comes time for your installer to pull permits or your home insurance company asks questions after a storm.
Types of Solar Mounting Kits
Pitched Roof Mounting Kits
The most common type by far. Pitched roof kits are designed for angled rooftops with traditional rafter construction. The mounting process involves drilling through the roof into the rafters below, installing flashed roof anchors (sometimes called roof hooks or L-feet), and then attaching the railing system on top.
These kits come in versions optimised for different roofing materials:
Composition shingle kits are the most widely used. They include flashed stanchions or L-feet with EPDM rubber seals that compress under the shingle above, creating a weathertight penetration.
Metal roofing kits — designed for standing seam or corrugated metal — often attach without any penetrations at all, using clamps that grip the seam ridges. This is a major advantage if you're trying to avoid drilling into your roof.
Tile roof kits (for concrete or clay tile) require tile hooks that slide under the tile above, anchor to the rafter, and allow the tile to rest back in place. These take more time to install but don't require permanently removing tiles.
Low-pitch membrane kits (for roofs under about 10 degrees) typically use ballasted or adhered systems rather than penetrations, since very shallow pitches need different waterproofing approaches.
Flat Roof Mounting Kits
Flat roofs are common on commercial buildings and increasingly on residential properties with modern architecture. Flat roof mounting kits typically tilt the panels at an angle (usually 5–15 degrees) to shed water and improve energy production.
The main attachment options are:
Ballasted systems use weighted bases — typically heavy plastic or concrete blocks — to hold down a racking frame without any roof penetrations. They're fast to install and preserve the roof membrane, but they add significant dead load, so you'll need a structural assessment first.
Mechanically attached systems anchor directly into the roof deck through the membrane, using specialised flashed penetrations. They're better for high-wind zones where ballast alone might not be enough.
Hybrid systems combine some ballast with a few strategic anchors, balancing minimal penetrations with wind resistance.
Ground Mount Kits
Ground mount kits are ideal when roof space is limited, shaded, or structurally unsuitable. They also tend to produce slightly more energy because you can orient them perfectly and clean them more easily.
Standard ground mount frames are freestanding steel or aluminium structures anchored with driven posts or concrete footings. Sizes range from small residential setups (8–12 panels) to large commercial arrays.
Adjustable tilt ground mounts allow you to change the panel angle seasonally — tilting steeper in winter to catch lower sun angles, and flatter in summer. This can meaningfully improve annual yield in higher latitudes.
Pole mounts attach multiple panels to a single central pole. They're particularly useful on properties with limited flat ground, since the panels can be elevated above landscaping, animals, or snowpack. Some pole mounts include a manual or motorised tracker that follows the sun through the day.
Specialty Mounting Kits
Beyond the main categories, you'll find kits designed for specific applications:
Carport and pergola kits turn functional outdoor structures into solar generators. Bifacial panels on carport structures can even generate some power from reflected light off the ground below.
RV and van roof kits are lightweight systems designed for vehicles, with vibration-resistant connections and aerodynamic profiles that reduce drag at highway speeds.
Boat and marine kits use corrosion-resistant materials — typically marine-grade stainless steel and anodised aluminium — to handle saltwater environments.
Shed and outbuilding kits offer a simpler solution for detached structures, often used to power workshops, irrigation systems, or off-grid battery setups.
Key Features to Look for in a Solar Mounting Kit
Material Quality
Aluminium is the dominant material for solar racking, and for good reason: it's lightweight, corrosion-resistant, and strong enough for the job. Look for 6061 or 6063 aluminium alloys in the structural components. Stainless steel fasteners (Grade 304 at minimum, Grade 316 for coastal or humid environments) resist rust and galvanic corrosion far better than zinc-plated steel.
Avoid kits that mix incompatible metals without proper isolation. Aluminium and steel in direct contact, particularly in wet conditions, can corrode each other surprisingly quickly.
Wind and Snow Load Ratings
Every legitimate mounting kit should specify the wind and snow loads it's been tested and certified to handle, usually expressed in pounds per square foot (psf) or Pascals. These ratings need to match (and ideally exceed) the design loads for your location.
In the United States, local building departments typically reference ASCE 7 for wind and snow load requirements. Your area's ground snow load and basic wind speed are the starting figures, but the actual design loads for your racking depend on roof slope, panel height above the roof, exposure category, and other factors. A reputable mounting kit will include engineering documentation that helps with this calculation.
Certification and Compliance
Look for mounting kits certified to UL 2703, the standard for mounting systems, mounting devices, clamping and retention systems for solar panels. UL 2703 covers both mechanical performance and the grounding and bonding requirements that are increasingly part of electrical code compliance. Some kits are also certified to specific international standards (IEC 62938, ISO 9001 manufacturing quality) if you're sourcing internationally.
Ease of Installation
A well-designed mounting kit shouldn't require a PhD to install. Look for:
- Pre-assembled components where possible — roof anchors with integrated bonding, clamps that hold position before being fully tightened
- Clear installation documentation with torque specifications, spacing guidance, and roof anchor placement guidelines
- Splice hardware for joining rail sections on larger arrays
- Integrated wire management channels or clips built into the rail profile, so you're not zip-tying cables to the frame later
Adjustability
No two roofs (and no two ground sites) are perfectly flat and consistent. Good mounting kits offer some adjustability in height and spacing to accommodate minor variations in rafter spacing, roof surface irregularities, or panel size differences between manufacturers. Slotted holes, adjustable L-feet, and modular mid-clamps all help.
Matching the Right Kit to Your Panels
Solar mounting kits are generally compatible with standard-frame panels from most major manufacturers, but there are a few things worth checking:
Frame width — mid clamps and end clamps need to match your panel's frame thickness (typically 30–50mm). Most universal kits include multiple clamp sizes or spacers.
Module weight — heavier panels (some bifacial models exceed 30kg) may require closer rafter spacing or additional mounting points compared to standard 20–22kg panels.
Frameless and thin-film panels require different attachment approaches — typically specialised clamps that grip the laminate without a frame, or integrated mounting feet bonded to the panel back.
If you're buying panels and mounting hardware together, many suppliers offer matched kits or can confirm compatibility. If you're buying separately, cross-reference the panel's installation manual with the racking system's load tables.
Installation: What to Expect
While a detailed installation guide depends on your specific kit, the general sequence for a pitched roof installation looks like this:
Locate rafters using a stud finder and mark their positions. Plan your anchor layout so each anchor lands in a rafter — not just in the roof deck. Install roof anchors, applying flashing according to the kit instructions and local roofing best practices. Attach rails to the anchors, level them, and set the correct spacing for your panel layout. Mount panels to the rails using end clamps at the array edges and mid clamps between panels. Complete grounding and bonding connections as required by your electrical code. Route and secure DC wiring through the rail channels or along the underside of the array.
For most residential installations, a two-person crew can complete a standard roof mount in a single day. Larger or more complex systems obviously take longer.
Why Cheap Mounting Kits Are a False Economy
It's tempting to save money on mounting hardware and spend it on an extra panel or a better inverter. But mounting hardware is genuinely one area where cutting corners has outsized consequences.
A mounting kit failure doesn't just damage your panels — it can damage your roof, create an electrical hazard, and void the warranty on your panels and inverter if they were improperly installed. After a major wind event, insurers and building inspectors will look closely at whether the mounting system was rated appropriately and installed correctly.
The price difference between entry-level and mid-tier mounting kits is usually modest relative to the total system cost. Spending an extra few hundred dollars on a certified, well-documented system from a reputable manufacturer is one of the most cost-effective choices you can make in a solar installation.
Solar panels get all the attention, but it's the mounting system underneath that determines whether your investment stays put for the next quarter century. A properly specified and installed mounting kit protects your roof, keeps your panels performing at their best, and ensures your system passes inspections and maintains its warranties.
Whether you're installing a small residential rooftop array, a large ground mount on a rural property, or something in between, there's a mounting kit designed specifically for your situation. Take the time to match the right system to your roof type, your local climate loads, and your panel specifications — and you'll have hardware you genuinely never have to think about again.